What a messy process it is to make paper! First I had to figure out where to do it. I decided the garage and laundry room were the most impervious to the water I expected to splash around. I had watched the video on papermaking by Catherine Nash several times so I would know what I needed and could visualize the steps. I had all my supplies. Since this was simply a practice session, not a time to make the real paper for my book, I decided to use the junk mail paper I had shredded plus some dryer lint as the basis. I soaked it overnight and then ran it through the blender in small batches until I had a tub full. That took an hour or so. I set the tub on the dryer in the laundry room. The couching surface was on the washer nearby which I covered with towels and felt. In the garage, I had set up a table with a drying board (actually a "white board" I bought at Lowes). It needed to be smooth to give my paper a smooth finish. The pulp was gray, which I expected because the junk mail was printed paper. The ink makes it gray. When I make the real paper, I will use white pulp.
This was very good practice. I could see that I had made the pulp a little thick. The paper was heavier than I wanted. When I tried to thin down the pulp, however, it stuck to the screen. This will take some practice to get the thickness I want. I dipped the screen, got a nice batch of pulp and let it drain. Then I tipped the layer onto the couching surface. I blotted it dry, took it to the garage drying board, and rolled it with a blotter. This was to dry the paper further and make sure it stuck to the board. After a couple of sheets, I decided to add some stuff to the pulp: flowers and cut up raffia. I liked the appearance of the flowers; however when the paper dried, the petunia petals turned brown. The rest of the flowers retained their color. Another area for practice!
After several hours of work, I had eight sheets of paper. This is not going to be a very efficient process, I can see that. Of the eight, there was one I liked. But I learned a lot!
Clamshell box and book

Batik fabric covers both the clamshell box and matching book.
Pamphlet Binding

Pike Stories pamphlets and box
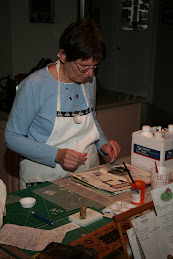
Coptic Book

Nancy with her finished work.
Bookbox

Three books and their box.
Shell Book Closed

A pair of pen shells encase the text block which has a coptic binding.
Shell Book Open

Poetry, illustrations on many kinds of paper comprise the content of the book.
Nancy's Books

Covers are made with my decorative paper.
Paste Paper
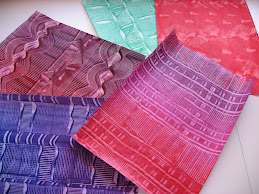
This was made with a cornstarch base.
My Handmade Paper
Samples of the resulting paper, showing the inclusions.
More Papermaking
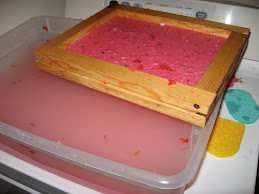
The paper pulp is ready to be couched onto an absorbent surface.
Inside the Minibook

Digital photos from our Wisconsin trip comprise the illustrations. I am ready to letter the text.
The Minibook

The covers are made of matboard and brocade.
Inside Travel Book

I used my handmade paper inside.
Travel Books

The covers are made from paper from Ventiane, Laos..
Making the Altered Book
After I outlined the book, I designed the pages and then started clipping and pasting.
Altered Book Cover

Spackling paste formed the front cover, then I added paint and ribbon yarn.
Altered Book Page

This page illustrates features of our Rome stay.
Another Page
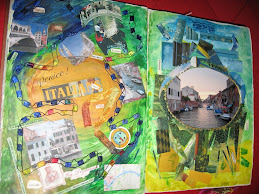
After gluing a group of pages together, I cut an opening that became the frame for my photo of Venice.
Making Paper

After couching the wet paper onto absorbent fabric, I can lift it off and place it on a flat surface to dry.
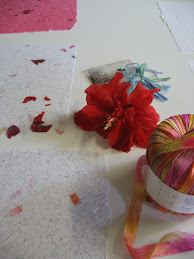
Drying Paper

I am using felt and a rolling pin to absorb the water from the paper I made. This was my first trial. I put flower petals in some of the paper.
Penland School
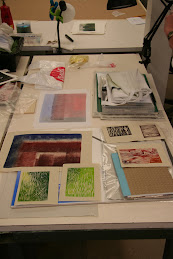
This is my desk and some of the prints I made during class.
No comments:
Post a Comment